Categories
Bonsai How To

Making My Water-and-Land Penjing (Part 2)

Indeed, the land of a water-and-land penjing is very much similar to a forest bonsai (here is a post about My First Forest Bonsai).   It is the extra shorefront and water area that make a water-and-land penjing has a more complex composition.  The overall structural unity of a water-and-land penjing is critical.  Design elements such as trees, rocks, moss, water, figurines all need to be in harmony with each other and contribute to the design in a natural and meaningful fashion.  Hence, we have to be very careful when selecting our materials.  Besides the tree species and the number of trees to be used, we also have to think about the height and trunk angles of the trees, the type of rocks to be used, the size, shape, color, surface details of the rocks, the relative size and the compatibility of the figurines with the penjing, etc, etc…  In the end, each and every element in the water-and-land penjing should relate to each other so that the entire bonsai appears as one all-embracing, strongly bonded entity.

Continue from Making My Water-and-Land Penjing (Part 1), let me show you how to make the land of my water-and-land penjing in this post.

water-land-penjingFirst of all, make sure the land part of the water-and-land penjing has a drainage hole.  (Sorry, I should have mentioned this earlier in Making My Water-and-Land Penjing (Part 1) for we would need this to be ready before creating our rocky shorefront 😛 )  Properly cover the drainage hole with a drainage mesh  so to prevent soil from falling through the hole.

water-land-penjingWe usually use odd number of trees in water-and-land penjing as well as forest bonsai.  When we pick the trees for our bonsai, make sure we pick trees with a variety of heights.  In the nature, there are trees of different heights.  There are some tall, old trees, while there are some short, young ones.  Plus, our penjing will look so boring if all the trees have the same height.   In addition, make sure we pick 1-2 trees that are especially tall.  They will be the “main trees” in our water-and-land penjing.

water-land-penjing water-land-penjing

Trim off the root ball of our trees, or else our trees wouldn’t be able to fit into the shallow container of our water-and-land penjing.  Here, I trimmed off as much as 60-70% of the root balls.

water-land-penjingNext, we need to design the tree placement to get the most natural looking arrangement. In general, we put the main tree(s) in the center area so to let it grab most of the attention.

water-land-penjing

Once we have confirmed on the placement of our trees, we add soil.  A chopstick will be very helpful here.  Poke around with your chopstick and make sure there is no gap in between trees that is not filled with soil.  And since we have cut off much of the roots, we need to trim off some foliage of the trees as well, so to make it easier for our trees to adapt and grow in their new home.

water-land-penjingThis is my water-and-land penjing.  Because the sun has been very strong in Hong Kong lately, I have already had my penjing in a shady area for 3 weeks, and probably will keep it in the shade for another week before bringing it out to the full sun.  Later, I will also trim and train the branches so to arrange the density of the foliage and make the penjing look better 🙂

Categories
Bonsai How To Featured Articles

Making My Water-and-Land Penjing (Part 1)

Last month, I took a 3-session bonsai class and made my very first water-and-land penjing (penjing is bonsai in Chinese) in the bonsai workshop. Before taking this class, the idea of making my own water-and-land penjing was quite intimidating. I just never thought that I could build a penjing with such complex composition, involving design elements such as trees, rocks, mosses, water and figurines, all in harmony with each other and contribute to the whole penjing in a meaningful fashion.

For those who are not familiar with water-and-land penjing (水旱盆景, shuihan penjing),  you can check out this post – The Main Categories of Chinese Bonsai (Penjing) – to learn more about the three main categories of Penjing.

And here, let me show you how to make a water-and-land penjing.

water-land-penjing

First, we build a shore front with stones to separate the land and the water in our penjing.  In class, we used the small stones that we bought in Yingde (if you wonder what kind of place is Yingde, check out this post – Rocks for Landscape Penjing (Bonsai)).  Try to show the best side of the rocks by having the most attractive parts of the rocks facing front. In addition, a curvy shoreline with different elevations looks more natural and interesting than one that is  straight and flat 😉

water-land-penjing

Then, we add the glue – cement!  Don’t move away the whole set of rocks, but do this one piece at a time.  Or else you will forget the composition and can’t put the rocks back to how you have first designed them to be.

water-land-penjing

Put a layer of cement that is thick enough to block all the holes and cracks between the rocks.  This is a very important step because we have to ensure that no water or soil can leak out through the cracks between the rocks.

water-land-penjing

After we have glued all rocks with cement, we let the cement dry out for a while first, maybe 15-20 minutes.  Then we use a small paintbrush and water to clean up the excess cement on the rocks.

water-land-penjing

The less noticeable the cement is the better.  We basically want to blend the cement with the rocks so that one cannot really tell where the cement is added when she/he is looking at the water-and-land penjing later.

water-land-penjing

And here I have the shoreline of my water-and-land penjing done.  In the next post, I will show you how I made the “land” part of my water-and-land penjing.

Categories
Journal Wiring

Removing the Bonsai Wire Just Too Late

Bonsai-wire-remove Bonsai-wire-remove

It’s crazy how fast my Chinese elm (榆樹 in Chinese) is growing. Last month, I wired this branch of my Chinese elm right before two weeks of rainy days. When I went back and checked the wiring two weeks later, I found that the branch had already been embedded deeply into the bark 🙁

Bonsai-wire-remove

I quickly went to the other end of my bonsai rack and checked my Surinam cherry (aka red Brazil cherry, 紅果 in Chinese) which also had a branch wired on the same day as the Chinese elm. And I was so relieved when I found that the Surinam cherry was totally fine, looking more or less like how it was two weeks ago.

Here, I have learned two lessons.

One: Some trees grow incredibly fast, especially those in its growing season with proper care, regular watering and fertilization. We should keep a close eye on the fast growing trees such as Chinese elm and Fukien Tea so that we can react right away to any small damage we find on the bark.

Bonsai-wire-remove

Two: Bonsai wires should not be tied too tightly around the branch or twig of our bonsai tree. Wiring two or three times in succession won’t harm our bonsai tree. Yet, we will harm our tree if we have to tear out the wire that has been embedded into the bark.

Ok, lessons are learned but damage is irreversible.    Now I just hope that the scar will recover and look less obvious as time goes by.

Categories
Featured Articles Journal

My First Forest Bonsai

Forest-Bonsai-Penjing

I took a forest bonsai class earlier this month and this is the first forest bonsai I have ever made. And yes, I love my work and am proud of it.

Forest-Bonsai-Penjing

We were given seven pine trees, a marble slab, a bonsai figurine, a piece of bonsai pot drainage mesh, and a rubber strap. The rubber strap is used to wrap around the soil to prevent it from falling apart. The strap can be removed once the root systems of the trees have grabbed the soil strong and tight enough.

Forest-Bonsai-Penjing

I spent quite a lot time thinking about tree placement to get the most natural looking arrangement. For example, during the class, Teacher Wong kept reminding us that trees in a forest bonsai should not fall directly behind one another when viewed from the front. It wasn’t as easy as it sounded, for there were seven pines we had to arrange on a small little marble slab. Moreover, we also needed to leave a clear area for the cow figurine which we would place after the forest bonsai was made.

Forest-Bonsai-Penjing

After we had designed the tree arrangement for our forest bonsai and got approved by Teacher Wong, we added in soil and moss. Then, we watered our forest bonsai thoroughly once they were made, as soon as possible.

Forest-Bonsai-Penjing

I am currently keeping my forest bonsai under my bonsai rack.  Our newly made forest bonsai should be kept under shade with indirect sunlight for at least two weeks, and gradually expose the forest bonsai to more and more sun afterward.

Categories
Bonsai Figurines

Figurines in Penjing

Bonsai-Figurine-Mudman
Taken in Bonsai Exhibition of 2010 Hong Kong Flower Show

As mentioned in an earlier post – Chinese Penjing & Japanese Bonsai, one of the major difference between Chinese penjing and Japanese bonsai is the scope of these two related art forms. With the meaning of the words – “bonsai” (盆栽) and “penjing” (盆景), it is clear that while the Japanese bonsai is focusing on the creation of a perfect tree, the Chinese penjing is more of reproducing a miniature natural scene. Many of the elaborate tray sceneries created by Chinese artists clearly defy the parameters of bonsai.

So, Chinese penjing is a little less “strict” and often involves the use of rocks, small figurines and mudmans, multiple trees, and water to complete the illusion of a landscape in a bonsai pot or on a marble slab. Little clay structures like huts, pagodas, boats and bridges are also often use in penjing. And with these traces of human existence that are frequently found in many Chinese painting, the close connection between penjing and painting is obvious.

Bonsai-Figurine-Mudman
Taken in 2009 Guangzhou Penjing (Bonsai) Exhibition
Bonsai-Figurine-Mudman
Taken in 2009 Guangzhou Penjing (Bonsai) Exhibition

Figurines have always had a place in Chinese penjing as an aesthetic contribution. In an effort to capture the realism of a favorite scenic view, an intricate part would involve the use of figurines of people, animals, huts and temples, to give an appearance of great age and size to the miniature forests.

Categories
Bonsai Figurines

Stories of the Eight Immortals

bonsai-figurine-mudman

A few days ago, I showed a set of bonsai figurines of the Eight Immortals to a friend from UK. I didn’t expect him to know anything about the Eight Immortals, and I was about to tell him more of this Chinese folklore. Yet, to my surprise, what my British friend knows of this group of legendary fairies is quite a bit, if not more than I do! (My friend later told me that he did a Wikipedia search after he bought a scroll of the Eight Immortals in Shanghai.)

So, the Eight Immortals are characters found in Chinese folklore. They were actually mortal beings until they performed kind deeds, or got into some miraculous accidents. These Eight Immortals represent all kinds of people – rich, poor, young, old, man, woman, military, cultured, noble. Because they are not gods, they can only visit, but not live in Heaven. These Eight Immortals enjoy traveling. They love to get together and roam around, often causing both laughter and troubles. They fight dragons, steal from Gods, enjoy parties and a good drink.

Below is a brief description of each of the Eight Immortals.

Zhang Guo Lao (張果老)Bonsai-Figurine-Mudman

Zhang Guo Lao is represented as an old man riding a white mule with a tube-shaped musical instrument made of bamboo in his hands. This white mule could get Zhang to incredible distances, and be folded into Zhang’s wallet at the end of each journey. Whenever Zhang wanted to travel again, he would sprinkle water on his wallet and the white mule would reappear.

Bonsai-Figurine-Mudman

Zhong Li Quan (鐘离權)

Zhong Li Quan is the Chief of the 8 Immortals. He is the fat guy with his bare belly showing. Zhong always carries a fan and sometimes a peach.Bonsai-Figurine-Mudman

Cao Gou Jiu (曹國舅)

Cao Gou Jiu was the brother of the Emperor of the Song Dynasty and the son of a military commander. He is the finest dressed among the eight immortals. He is always shown wearing formal court dress and carrying castinets.

Bonsai-Figurine-Mudman

Li Tie Guai (李鐵拐)

Li Tie Guai is depicted as a beggar with a crutch and a gourd. The legend has it that Li had the magical skill of freeing his soul from his body. One day while Li’s spirit was gone from his body, his body was found and mistakenly thought as dead. It was then burned, as was traditional. When Li returned from his travels, he found that he had lost his body and was forced to enter the body of a lame beggar.

Lu Dong Bin (呂洞賓)Bonsai-Figurine-Mudman

Lu Dong Bin was an 8th-century scholar. Upon his back he wears a magic sword that used to slay dragons and demons. In his hand he carries a fly brush.

Bonsai-Figurine-Mudman

Lan Cai He (蓝采和)

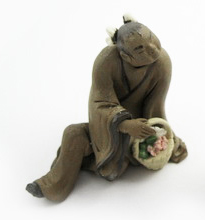
Lan Cai He is variously portrayed as a youth, sometimes as a boy, other times as a girl. He/She is the strolling singer who often shown wearing blue robe and carrying a basket of flowers.

He Xian Gu (何仙姑)Bonsai-Figurine-Mudman

One day when He Xian Gu was in the mountain collecting herbs, she met Lu Dong Bin who gave her a magic peach. After He ate the peach, she became immortal with the ability to see the future. He is often seen carrying a magical lotus blossom and a fly-whisk.

Bonsai-Figurine-Mudman

Han Xiang Zi (韓湘子)

Han Ziang Zi is the Happy Man. He is said to be the nephew of Han Yu, a famous scholar in Tang Dynasty. Han is always seen playing a flute. It is said that Han could make flowers bloom with his will and soothe wild animals with his music.

Categories
Bonsai How To

Potting a Semi-Cascade Style Bonsai Tree

Due to the angle of the slanting trunk and sideway extended branches, potting a semi-cascade or a cascade style bonsai tree can be quite tricky sometimes. We must be cautious of the tilted center of mass and be extra careful when we lift the bonsai tree around during potting.

Pot-Semi-Cascade-Style-Bonsai-Tree Pot-Semi-Cascade-Style-Bonsai-Tree

The bonsai pot we use for semi-cascade style bonsai tree should be relatively deep. It can be round, square, octagonal, hexagonal, or a deep cascade.

Pot-Semi-Cascade-Style-Bonsai-Tree Pot-Semi-Cascade-Style-Bonsai-Tree

Surface roots of a semi-cascade or cascade bonsai tree should radiate in several directions, with the strongest on the side away from the direction of the leaning tree (ie: if the bonsai tree leans to the right, its strongest roots should be radiating towards the left). In addition, it usually involves major root pruning when the tree is first collected and potted in a bonsai pot because it requires much long, thick root removal and the growing of fine roots closer to the trunk. While some prefer to do root pruning in stages, the root pruning of this Ficus is done completely in one time. Severe root pruning can be done if branches and foliage are also severely reduced at the same time.

Pot-Semi-Cascade-Style-Bonsai-Tree Pot-Semi-Cascade-Style-Bonsai-Tree

We must make sure the roots where we want new growth of fine roots are covered with soil. In this case, since some roots of this Ficus are not long enough, we added a bendable plastic sheet in the interior of the bonsai pot to allow proper coverage of all the roots of the bonsai tree with potting mix. Once new roots have developed strong and long enough, we can take away the black plastic sheet.

Pot-Semi-Cascade-Style-Bonsai-Tree

And last but not least, we add chunks of pond soil silt on top of the soil mix for better root protection as well as its mineral value.

Pot-Semi-Cascade-Style-Bonsai-Tree Pot-Semi-Cascade-Style-Bonsai-Tree

Categories
Journal

Not Quite Yamadori

Yamadori is a Japanese word meaning “collecting plants in the mountain”, and unquestionably, one of the things that bonsai enthusiasts often get tempted to do but end up restraining himself/herself from doing due to law restrictions, as well as the awareness of the need to preserve our nature. For this reason, Teacher Wong and some senior members of the club – Institute of Lingnan Penjing, Hong Kong – have planted hundreds of trees years ago in the workshop for bonsai material in the future. And many thanks to them all, today many of these trees have grown into good bonsai materials for us to use in our bonsai.

Earlier in April, I have bought two trees in the bonsai workshop and with Yik’s help, transplanted the trees into my land. One of them is Fukien Tea (Carmona microphylla, 福建茶 in Chinese) and the other one is博楠 (I don’t know the botanical name or the common name of this tree but only the Chinese name).

Yamadori-Bonsai-Tree Yamadori-Bonsai-Tree

Digging up my 博楠 (the tree that I don’t know its botanical name or common name)

Yamadori-Bonsai-Tree Yamadori-Bonsai-Tree

LEFT: Here actually are two Fukien Tea growing closely together.  It was a bit tricky to dig up mine without disturbing the other one.

Yamadori-Bonsai-Tree Yamadori-Bonsai-Tree

My trees after pruning the branches and roots – LEFT: 博楠; RIGHT: Fukien Tea

Yamadori-Bonsai-Tree

Although the shape of my bonsai material may not be very interesting when I first got it, I will make it into an interesting one! For example, I am intended to make the 博楠 (the tree closer to us) into a semi-cascade style, like a tree that grows over a riverside or a lake (maybe I will elaborate on this later in another post).

Okay, so this is not quite yamadori. Here, we don’t have tortured, bended trees hanging on the side of a mountain cliff. But we have a safe and suitable environment for us to dig up trees and ensure the greatest chance for the trees’ survival after the transplanting.

Categories
Bonsai Pots Featured Articles

Introduction of Yixing Zisha Bonsai Pot

Yixing-Clay-Bonsai-PotIt is said that if we use a Yixing zisha teapot for many years, we can brew tea just by pouring boiling water into the empty pot. Highly praised for its porous nature, which works wonders in absorbing the flavor of tea, Yixing clay makes awesome teapots, while at the same time, is also an excellent material for making bonsai pot.

Yixing clay potteries are usually left unglazed. With Yixing clay’s porous nature, Yixing bonsai pot is excellent in moisture absorption and ventilation, very suitable for the growth of bonsai trees. Moreover, the unpretentious earthy tones and subtle beauty give more reasons for the bonsai enthusiast to fall in love with these bonsai pots that are made of Yixing clay.

Yixing – The Capital of Chinese Pottery

Yixing (宜興) is located in the Taihu Lake drainage area of Yangtze River Delta, about three-hour drive away from Shanghai, or an hour from Wuxi. Enjoying the reputation as “the capital of Chinese pottery”, Yixing is splendid in the pottery culture and tea culture.

Yixing Clay

Yixing clay has been made into pottery for thousands of years in the Yixing area. While there are Yixing potteries showcased in museums dating back as far as 6,000 years ago, many would agree that Yixing/zisha pottery started in the Northern Song Dynasty and flourished in the Ming and Qing Dynasty. Yixing clay occurs naturally in three characteristic colors: purplish brown (zisha clay, 紫砂泥), light greenish buff (鍛泥), and cinnabar red (朱泥). Other colors are created by mixing these three colors or by adding mineral pigments.

There is a household story about the discovery of Yixing clay.

Long, long ago, a monk came to Yixing one day and told the locals that he had something valuable to show. People of Yixing were curious and followed the monk into a cave, where the monk suddenly disappeared without any trace. While the local people of Yixing couldn’t find the monk, they found a very unique kind of clay – Yixing zisha clay.

Yixing-Clay-Bonsai-Pot

You may also be interested in this article – Bonsai Pots of Different Materials

Categories
Journal

My Bonsai Land Update – What is the Black Cloth for?

After reading my earlier post about my bonsai land, a friend, Irene, asked me why I covered up the soil with the black cloth again after all the plowing and pulverizing of the soil. I told her the black cloth is there to avoid weeds from growing. And here, with a few more photos, let me show you how the black cloth is used.

bonsai tree workshop

In a 10 ft x 10 ft space, I have planted five trees.  At the top left, there is a Ficus Microcarpa “Tiger Bark” (虎皮榕 in Chinese).  At the bottom left, there is a Eugenia uniflora. Linn., aka Surinam cherry, red Brazil cherry (紅果 in Chinese). In the center, I have a Murraya paniculata, aka Orange Jasmine (九里香 in Chinese).  At the top right, there is a Carmona microphylla aka Fukien Tea (福建茶 in Chinese).  And for the one at the bottom right, all I know is its Chinese name – 博楠 – but neither its botanical name nor common name…  I did a Google search, yet found no luck.  Does anyone know the botanical name or English common name of this tree?

And instead of planting the trees on the ground level, I have planted my trees a bit higher for easier viewing and pruning in the future.

bonsai tree workshop bonsai tree workshop bonsai tree workshop

In order to give the root systems of my bonsai trees as much space to grow and develop as possible, I have cut an opening on the black cloth underneath every one of my trees.  While some openings fit perfectly with the bendable plastic sheets that I use as container (like the one on the left), there are some that are cut too big.  To avoid weeds from growing, I covered up the exposed soil ground with some bricks.

bonsai tree workshop bonsai tree workshop
LEFT: This is the tree that I have no idea of its botanical name, as well as its common name.  It is called 博楠 in Chinese;  RIGHT: Carmona microphylla aka Fukien Tea (福建茶 in Chinese)

bonsai tree workshop bonsai tree workshop
LEFT: Murraya paniculata, aka Orange Jasmine (九里香 in Chinese);  RIGHT: Eugenia uniflora. Linn., aka Surinam cherry, red Brazil cherry (紅果 in Chinese)

bonsai tree workshop bonsai tree workshop
Ficus Microcarpa “Tiger Bark” (虎皮榕 in Chinese)